Homeschool Discoveries

Sharing a few things I've discovered along the way…

S is for Science Plans July 23, 2013

Filed under: Curriculum,Science — kirstenjoyhill @ 8:29 am

We try to be a “science-y” family.  It’s a pretty important subject — especially to my husband, who makes his living as a scientist!  If you’ve been reading my blog for a while and saw my “curriculum preview” in last week’s wrap-up post, you might have noticed we’re taking a different direction with science this year.

For the past three and a half years, we’ve used BFSU (Building Foundations of Scientific Understanding) as our primary science curriculum.   Volume one of this program gives kids an excellent foundation in all the disciplines of science.  I love how the author, Dr. Nebel, has a way of explaining concepts often not presented until late elementary school in a way that even 1st graders can understand.  It’s not a program that’s “easy” to use, but after several years of using Vol. 1, I can say I know it well and can present most of the lessons with ease.  I even used it as a basis for teaching a co-op class this past year.

By early last year, we had finished nearly all the Vol 1. lessons with Miss M, so I purchased an e-book of Vol 2.  I was much more intimidated!  While I was able to easily teach a few topics from it, like Simple Machines, a lot of the topics in Vol. 2 were things I didn’t learn about until high school or later, and I am not sure how solid my personal understanding is on some of them.  My last biology class was as a freshman in high school, over 20 years ago.  A number of lessons call for using a nice microscope, something we weren’t quite yet ready to purchase.   There are fewer “fun” activities and much more lecture/discussion.

We filled in our science plans pretty well last year with a combination of a few lessons from BFSU 2, Sassafras Science Vol 1 – Zoology, and interest-led studies on various topics.  I kept thinking, “we’ll be ready to do BFSU 2…soon.”

As I thought about next year, I had to face up to the fact BFSU 2 is not the curriculum for me.  I have no doubt that given enough time to study and prepare, I could learn the concepts well enough from the BFSU 2 manual to present them.  But I don’t think that’s how I need to be spending my time at this point.  I also decided I wanted something with text that is designed to be read directly to or by the student, so that the main content delivery doesn’t rely on library books or a lecture from me — something that BFSU doesn’t provide.

While I like the BFSU approach of studying topics from several science disciplines in the same year, most homeschool science curricula are not set up in this way.  I decided that this might be a good year to start a four year “rotation” for Miss M through the four main disciplines of science.   We are going to start with Earth and Space science this year, then we will do Chemistry, Physics and finally Biology (not quite sure yet if Chem or Physics will be first, but I am excited about saving Biology for last when Miss M is a 7th grader and quite ready for dissections!).

I’ve decided we’ll use Christian Kids Explore Earth and Space as our primary curriculum CKEESthis year for science.  While I am not always very impressed with the quality of “Christian” science curricula (sometimes they seem heavy on the Bible and Apologetics content and lighter on the science content), I thought this looked pretty good.  Since we believe in a young earth creation, I thought that especially for an Earth science text, I wanted to not spend the whole year saying, “This says ‘millions of years,’  but we know that God did it in a much shorter time frame.”    My kids have definitely been exposed to science materials with this perspective, but I don’t want our main text to be coming from that angle.

Christian Kids Explore Earth and Space is divided into six units, each with a few lessons.  We’ll be following those units/lessons, as well as adding in a few Earth/Space related topics I wanted to cover that aren’t in the text.  This text will (I think) primarily be for Miss M (4th grade), but the boys will tag along as interested, and I will find library books for them.

Unit One:  Creation/Earth’s Structure (2 – 3 weeks)

Unit Two: The Lithosphere (6-8 weeks)

Unit Three: The Hydrosphere (5 weeks)

Unit Four: The Atmosphere (5 weeks)

Unit Five: Earth’s Weather (6 weeks)

Unit Six: Beyond Earth (5-6 weeks)

That should take us most of the way to the end of our school year in mid-May.  It also does not include our summer vacation out west (including Yellowstone!) where we will see first-hand many interesting Earth-Science related sights.  🙂

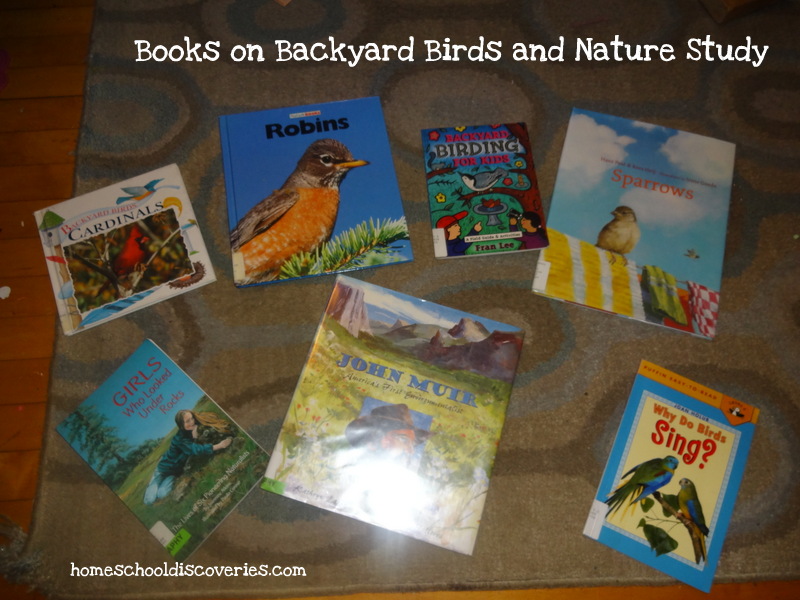
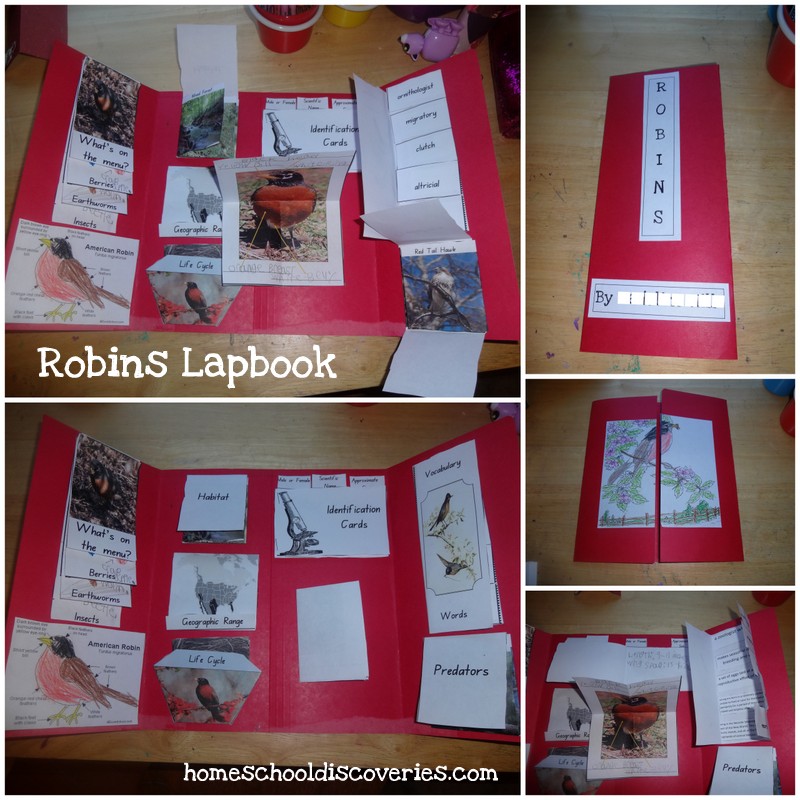
Miss M has also requested more nature study this year, so I am planning to set her up with some resources that will help her do that somewhat independently this year.

I am not abandoning BFSU all together — I still plan to use it for teaching my c0-op science class.  I also want to incorporate content from BFSU each year for the boys — whether that is through informal discussions or doing a lesson or two here and there with them.  I want to make sure they are getting that same good foundation in scientific principles that Miss M received.


I’m linking up with Blogging through the Alphabet @ Ben and Me, and with the Lesson Planning link-up for Science at Highhill Education.


Blogging Through the AlphabetSpeed!


Robins Lapbook and Backyard Birds unit May 7, 2013

Filed under: Science — kirstenjoyhill @ 10:46 pm

I’ve been meaning share about Miss M’s Robins lapbook and our unit on backyard birds for a while, but I just haven’t gotten around to it.  🙂  This year Miss M (age almost 9, 3rd grade) took an interest in the robins we were observing in our yard and she decided she wanted to learn about them in more depth.  We were only able to find one book solely devoted to robins at the library (that was available — we were on a long waiting list for a couple others that didn’t arrive in time).   Even though Miss M was most interested in robins, we took this opportunity to get books about other birds we see in our yard, as well as a few other nature-related books:

bird books

The books in the picture were some of Miss M’s favorites:

We also checked out a few assorted field guides — the most useful one was a guide for kids that focused on birds from our state.  We might buy a copy of that one.

Miss M also requested a lapbook on Robins.  I was beyond thrilled to find an excellent, free lapbook from Dynamic2Moms (Scroll down toward the bottom of the page to see the Robins unit).    Most of  Miss M’s lapbook came from that file:

Robins Lapbook 2013

We also found inspiration and information from the following sites:

American Robins @ Animal Diversity Web

Robins Lapbook and Unity Study @ Homeschool Creations

American Robin @ Journey North

American Robin @ Kidzone.ws

Various youtube videos of baby robins (I forgot to bookmark which ones we watched, but if you search terms such as “baby robins hatching”, you’ll find some neat videos!)

Miss M’s bird unit will culminate with an Ornithology class this Friday at a nearby nature area — though I guess it is really more of a “continuation” of her interest in birds.  Though our formal study for school on birds is finished, she can often be found in the yard or at one of our windows observing what the robins are doing in our yard.  🙂

Linking up with Science Sunday @ Adventures in Mommydom!

Science Sunday


Resources for a Unit on Rocks and Minerals (and a free printable minibook) February 27, 2013

Filed under: Science — kirstenjoyhill @ 1:16 pm
Tags:

We’ve just finished a science unit on rocks and minerals.  Most of this unit was focused on Miss M, my third grader.  The boys (K and Pre-K age) enjoyed the hands on part of the study, but were less interested in continuing the study beyond that point.

The hands-on element is pretty key to an interesting study on rocks and minerals.  You might be able to use samples you can find locally…or maybe you have a friend with a rock collection you can borrow.  But if not, buying rock and mineral sample kits is probably a good option.

After reading a bunch of reviews on Amazon and browsing the Home Science Tools website, I decided to go with the Rock Study Kit and Mineral Study Kit from Home Science Tools.   These kits were reasonably priced and I was very happy with what we received.  Since the kits looked similar to kits that got poor reviews on Amazon I wasn’t sure if we would end up with tiny specimens that would be hard to use.  But that wasn’t the case. Each specimen was reasonably sized and the kids had a great time examining them and doing the activities suggested in the instructions that came with the kits:

rock mineral study kits

I had originally planned on just doing a few library books and videos to go along with our hands on discussion and activities, but Miss M requested to make a lapbook for this unit.

As it happened, I already had purchased the Rocks and Minerals lapbook project pack from Hands of a Child last year — we just never made it to this science topic!

Miss M did a few lapbook pieces per week for the last couple weeks to complete this lapbook:

rocks minerals lapbook

Most of the minibooks in the lapbook came from the Hands of a Child lapbook kit, but we did use a few other items as well.   I found a neat birthstone foldable…and now I can’t seem to find the link to it.  (I’ll come back and add it if I do!)

One thing I had a hard time finding was good piece comparing the similarities and differences between minerals and rocks.  I thought it would be the perfect opportunity for a Venn Diagram.  I liked how this site used the analogy of flour vs. chocolate chip cookies to compare minerals and rocks.  So, I used that concept for a minibook cover and made the Venn Diagram inside.  If you would like a copy of this foldable minibook for personal/educational use, you may download it here.

Books we used for our Unit:

Magic School Bus chapter book “Rocky Road Trip: I read this aloud to all the kids.  It was fun and informational.

National Geographic Everything Rocks and Minerals: An informative book with lots of pictures.  Miss M read most of this book on her own.

100 Things You Should Know About Rocks and Minerals: Another fact filled, informative book we found at the library.  I don’t think Miss M made it all the way through this one.  I also read portions out loud to the boys as they were interested.

A Rock is Lively by Dianna Hutts Aston, Illustrated by Silvia Long: This is a much more “literary” non-fiction book with beautiful illustrations and shorter passages of text.  This one makes a much more interesting read-aloud than most of your typical non-fiction section science books we find at the library.

Videos we Watched:

DK Eyewitness Rock and Mineral

Bill Nye The Science Guy Rocks and Soil

Rock and Mineral Videos at The Happy Scientist (subscription site).

Just for fun:

The kids had been asking to make rock candy for a while, so we did that…even though it is really only loosely connected to actual rocks.  🙂 You can read more in this post about our adventures with rock candy.

One other note:

Most, if not all, the resources we use come from an old-earth perspective.   As a family we believe in a young earth creation.  However, these type of resources are not as easy to come by (certainly not at the library!).  We’ve chosen to handle this by discussing that scientists are looking at rocks and minerals from the perspective of how things might have come to be without God in the picture.  Since we believe God is our Creator, we know it didn’t need to take millions or billions of years.  So far, this has worked for our family and the kids seem okay with understanding why people might think the earth is really, really old and yet we don’t necessarily need to agree with this perspective.

Linking up with:
Science Sunday


Making Rock Candy February 11, 2013

Filed under: Fun Stuff and Extras,Science — kirstenjoyhill @ 10:09 pm

Making rock candy doesn’t sound so hard, does it?  Well believe it or not, we totally flopped at it the first time we tried a couple years ago.  🙂

Rock candy makes a great activity to go along with science lessons on topics like solutions and mixtures, evaporation and condensation, crystallization…or even rocks and minerals (though, of course, rock candy just looks like a rock!).  These would be lessons A-8 through A-10 if you are using BFSU for science like we are.

After reading a few blog posts and other sites with tips on making rock candy, I decided to go with the method I found in this post that I found via pinterest.  I liked their end product — a nice “candy store” sort of colored rock candy on a stick.

Here’s what our set-up and candy making process looked like:

Rock Candy

The actual adding-sugar-to-boiling water part of the process is, of course, not pictured.  I was too busy trying to manage four children who all wanted to help (my three older ones plus a friend), and trying to make sure it didn’t boil over or otherwise make a mess.

I followed the directions from the Design Dazzle blog post (linked above) almost exactly.  You definitely need to have plenty of sugar on hand to do this activity! I think seeding the sticks is a key part of the process — the sugar crystals need something to grow on if you want rock candy anywhere other than the bottom of your jar or container!  We didn’t “seed” our string we used when we tried to make rock candy a couple years ago, which may have been part of the problem — but then again, that time we got no crystals at all, so we may not have used enough sugar or not heated our sugar solution long enough.

Another tip for prospective rock candy makers — if you are using food coloring, do yourself a favor and don’t do any of the stirring with a wood spoon.  Yeah, I have an nice multi-colored stained spoon now!

Then wait a week or so and you’ll have…

Rock Candy Results

…Beautiful candy made of pure sugar!  The kids thought it was pretty tasty, and also enjoyed looking at the crystals through a magnifying glass.  I couldn’t bring myself to eat it.  I got a sugar headache just thinking about it!  Not all of our rock candy sticks turned out.  A few stuck to the side or bottom of the jar and were hard to remove.  As you can see from the picture in the lower right, we got a lot of sugar crystals forming on the bottom of the jar.  I’m not sure if that’s typical, or an indication of some error we made!  Maybe someone with more rock candy experience can shed some light on that subject.

I’m linking up with Science Sunday @ Adventures in Mommydom and with the the Monthly Blog and Tell link-up at the HSBA Post for their “Something  Red” theme with my RED rock candy!  Be sure to visit those link-ups to see what other bloggers are writing about!

Science Sunday
Homeschool-Blog-and-Tell-February-2013
 

Top Ten “Sciency” Things We’re Doing This Year September 24, 2012

Filed under: Science — kirstenjoyhill @ 10:42 pm

Our first few years of homeschooling were not very “sciency”.  Despite our best intentions, we were only half-way successful at implementing a very challenging-to-implement science curriculum called Building Foundations of Scientific Understanding (BFSU).  I tried teaching the lessons, but had a hard time knowing what to do.  We tried having Family Science Nights with Tony teaching, and did have a fair number of those, but not as many as we would have liked.

It also started feeling like science was in a bit of a “box.”   It was a subject we could only learn about at certain times — when Daddy was around, and we had time for a BFSU lesson and everyone was ready to listen attentively.

In the late spring or early summer it really hit me what I found most difficult about BFSU — it was not JUST that it was hard to look through the dense text of the lessons and figure out what to say — but also that there were no visuals or printables at my fingertips.  After complaining to various people about this, I finally thought of my own solution collaborative Pinterest boards (linked to my blog post about it) for BFSU users to join together and find these resources!

Looking through great resources on Pinterest led me to spend more time looking through the lessons, and I eventually decided that maybe BFSU wasn’t so intimidating after all.  And in general, I found myself more excited about science.   And in general, one thing led to another and I realized we were already having a very “sciency” year and liking it very much!

So here are 10 “sciency” things we’re doing (and maybe a few things you can do too!):

1. We’re making the most of the curriculum we already have. For us, that means we’re still doing BFSU volume one. I will be stepping out and trying to teach more of the lessons myself…But I will still ask Tony to help out with some of the demonstrations!  We have only a handful of BFSU Vol. 1 lessons that we haven’t done at all.  But there is so much depth in Volume 1 that given the ages of the kids, we will hang out in Volume 1 for a bit longer.  I also have to admit that after taking a brief look at volume two I am a bit intimidated.  You need Real Science Stuff like a microscope and a balance.  I’m not quite ready for that.  Maybe in 2013!

2. We’re adding some science that Miss M can do on her own.  I heard about Sassafrass Science Zoology late this summer, and I was very intrigued by it.  The price was low enough I decided to make the leap and try it out.   So, far so good!  Now even if life intervenes and I don’t get to as many BFSU lessons as I would like, I know Miss M has something she can work on pretty much on her own.

3. Reading Science Biographies — Starting with Scientists Through the Ages.  Miss M requested this — we’ll be reading one or possibly two of these short biographical sketches each week, and then Miss M will complete (with help) a notebooking page.

4. Interest led science topics (especially for the boys). The boys have been nuts about volcanoes and space recently.  I’ve been finding them printables and books and encouraging them to draw pictures about what they are learning and thinking about.  I love that they are so curious and it’s pretty easy to find resources to keep them happily learning about their current topic of interest.

5. Writing down questions the kids ask — to ask Daddy later or to research.  Despite having had college level science classes, there are so many things I’ve forgotten and many things I’ve never learned about science.  Right now, Miss M wants to know why people yawn and why people (especially young kids) rub their eyes when they are tired.  That reminds me, I still need to ask google the answers to these questions.  🙂

6. Doing “Science-y” fun activities — We did solar oven cookies this summer.  The kids did their own “mad scientist” demonstrations recently.  Tony helped the kids build model rockets last week.  The boys are also perpetually requesting to build robots, so that may be on the horizon as well. I’m putting Snap Circuits on the kids’ Christmas lists.  All these activities bring up fun science topics of conversation.

7. Watching science-related shows/videos – the kids are currently loving Magic School Bus and SciGirls.  I also bought a subscription to the videos at The Happy Scientist through the Homeschool Buyers co-op.  We’ve only watched two videos so far, but the kids liked it (and remembered things from the videos days later!), so I think we’ll definitely get our money’s worth from that purchase.

8. Reading books — I’m actively encouraging the kids to browse through the entire shelf I already have of science-related books, plus looking for new books at the library of course!

9. Random nature study/observation opportunities as they occur (and other outdoor activities like stargazing!).  We found raised monarch caterpillars over the summer, found an amazing big green caterpillar and watched a spider earlier this summer too.  Today the kids brought a “pet ant” inside in a homemade habitat (we’ll see how that goes!).  Nature observation opportunities in the city aren’t quite the same as the opportunities those who live in less urban areas have, but we try and make the most of it.

10.  Science at our co-op.  Not only does Miss M have a science class which she tells me she absolutely loves, and Mr. E will be doing some science/nature topics in his K class at co-op…I am teaching a science class.  I am still surprising myself that I am doing this.  🙂  I am teaching a 1st/2nd grade science class!   I have nine kids to teach for 45 minutes twice a month.  I am going to rely heavily on science lessons that Tony already did with the kids from BFSU, but I am putting some together myself.  I did a “new to me” lesson for the very first co-op meeting, and it went okay!  I haven’t done much group teaching in the past, so I am new to “classroom” dynamics, but I think we’re going to have a lot of fun.

I’m linking up with:

Top Ten Tuesday at Many Little Blessings


Collaborative Pinterest Boards for BFSU! July 20, 2012

Filed under: Science,Technology — kirstenjoyhill @ 11:42 am
Tags: ,

I’ve been distracted the last couple of days by a new endeavor.  I decided to act on my idea from my Top Ten Random Things post from Monday night and create collaborative boards on Pinterest for users of Building Foundations of Scientific Understanding (BFSU) by Dr. Bernard Nebel to share resources they have found with one another.

BFSU is a great science curriculum in many ways.  It is flexible, thorough and teaches real scientific thinking/understanding – not just memorizing random facts or vocabulary.  On the other hand, it is definitely not an “open and go” sort of program.  It takes teacher prep time to absorb Dr. Nebel’s material and decide how to present it.  Plus there is the time involved to set up demonstrations/experiments and find any other resources needed — pictures, videos, printables, etc.

I had a brilliant idea over the weekend (in my humble opinion). 😉  I thought to myself, why not harness the power of Pinterest to help users save time and easily share the resources they have found or created?

So earlier this week I created 5 collaborative Pinterest boards on my Pinterest profile — One for each “thread” plus a general board for resources that relate to all or multiple threads. (Look to the second row of boards to see the BFSU boards).

I’ve been spending a bit of time this week promoting the new boards among BFSU users, answering questions and adding both new pins and collaborators to the boards.  But hopefully once the boards are up and running they won’t take much of my time — ideally they will save time as Tony and I plan our science lessons.

Here are a few “Frequently Asked Questions” about the BFSU Pinterest boards:

What is Pinterest anyway? And what is “pinning”?

Pinterest is essentially a “visual bookmarking” website. You can “pin” a picture with a description of a web page. You can then organize those “pins” onto various “boards” (imagine like a virtual bulletin board) organized by topic or how ever you want to organize it. Then people who choose to “follow” you (or any one searching through the site) can see your boards and your pins. You can either pin something you find while searching the web or you can “repin” things that other people have already pinned (this just creates a copy of the “bookmark” for your boards/pinterest page). I love being able to glance through pictures from various things I have pinned (desserts from my dessert board, kids craft ideas, homeschool ideas, etc) and quickly find something I’m looking for.

Where do I find each of your specific boards for BFSU:

Will I find this useful if I use a science curriculum other than BFSU?

Yes, you will!  The only thing that won’t be very useful is lesson code designation in each tag (and maybe some BFSU specific lesson plans on the General board).  But otherwise, Thread A is loosely Chemistry and some Geology resources, Thread B is Life Science resources, Thread C is Physics resources and Thread D is Earth/Space science resources.  The ideas and resources pinned could generally supplement any curriculum.

How can I help? How can I collaborate on your Pinterest boards?

To collaborate on the BFSU boards, you first need to be a member of Pinterest (see next question if you don’t know how to do that).   Next you should probably “follow” the board(s) you want to collaborate on.   Then just leave a comment on one of the pins or send me an email with your Pinterest user name (kirsten @ tonyandkirsten dot org).  I will invite you to be a collaborator and you will get an email from Pinterest saying you need to accept the invitation in order to be able to pin on those boards.  Once you accept the invite, the BFSU boards will show up in your list of board options when you go to pin something.  Don’t forget to put the lesson “code” in the text of the pin (C-7, A-3, etc)  to make it easier for everyone to find resources related to a particular lesson.

If you don’t want to join Pinterest but want to contribute to the boards, feel free to email me sites/pages that you think should be pinned or if you are a member of the Well Trained Mind forums, you can leave a comment in this thread with your pin suggestions.

How do I join Pinterest? Do I have to have a Facebook account?

You need an invite to join Pinterest.  You can request one on the site (not sure how long it takes to get it) or you can request one from anyone who is currently a member.  Feel free to email me for an invite.  You do need either a Facebook or a Twitter account to get a Pinterest account.  A bit silly, I know.  If you are avoiding Facebook for whatever reason (and I know a number of people do avoid it!), it is not very difficult and less invasive to sign up for a Twitter account.  You can mark your Twitter profile as “private” and not add any or follow anyone, and this should be enough to get a Pinterest account.

What if I don’t want to join Pinterest? Can I still see the links that everyone Pins?

Yes, you can see the boards and pins and follow the links without joining.


Why Do Pop Cans Explode in the Freezer? (And Other Science Fun) July 15, 2012

Filed under: Science — kirstenjoyhill @ 10:55 pm

We ended up having a science-y sort of week this past week.  That wasn’t really planned!  I had intended to ease back into the school routine by just adding in history and spelling.  Of course, our science learning this week was mostly just a lot of fun!

Mr. E found the gigantic green caterpillar in our yard on Thursday night.  We had never seen anything like it!  After I very helpfully searched Google Images for  “Giant Green Caterpillar”, I was able to determine that it was most likely a Polyphemus Moth caterpillar. (This blog post was helpful — theirs looked just like ours!).   If it completes its metamorphosis it will become a very large brown moth.  We spent quite a while that evening watching it and letting it crawl on our hands.   We then let it go back on its merry way.  We haven’t seen it since then, but I am hoping it decides to make its chrysalis somewhere nearby so we can continue to observe!

Last Monday the kids planted seedlings while we were at the MN Children’s museum.  They sprouted on Friday and are now even bigger than they were in this picture.  We did a little bit of study of plants last spring, but we ran out of steam before the kids did any activities or demonstrations involving planting seeds.   They have been thrilled to check on the progress of their seedlings each day, and we aren’t even sure what kind of plants they are.  😉

And finally, I am so proud of myself for turning a random question into a real learning opportunity.  Miss M asked me while we were driving in the car on Friday, “Mom, why do pop cans explode when you put them in the freezer too long?”  She was remembering a time a number of weeks ago when Tony put a can of Dr. Pepper in the freezer and it made a giant mess.  It would have been really easy to just google the answer for her (since I didn’t know exactly off the top of my head, other than it probably had to do with the water expanding too much).

But instead, I asked her why she thought it might happen, and how she could teat her ideas.  At first, Miss M thought that maybe it was because soda pop might have baking soda in it, and that maybe things with baking soda are more likely to explode (like a baking soda/vinegar “volcano”!).  She figured out she could investigate that by reading the label on the can.  No baking soda there!  Next she suggested it was perhaps because it was too fizzy.  We couldn’t think of a good way to test that, so I hinted at other ideas.

Finally, she came up with the idea that maybe the pop might take up a different amount of space when frozen.  This is something we could test!

Our Hypothesis: A liquid expands in the freezer and has a greater volume when frozen.

Materials: Water, pop, clear glasses, baking soda (to also test Miss M’s baking soda idea with water), and a marker for the glasses

Procedure: We filled one glass with water, one with Dr. Pepper, one with water and baking soda, and one with “water and baking soda and salt and pepper” (at Mr. E’s suggestion!) 😉 We marked how full each glass was with a marker.  It was hard to see on the glass with the Dr. Pepper, so we added a mark with tape too.  We checked the glasses after two hours and also the next day!

Results: In the glass with the pop, the liquid seemed to expand the most, and not evenly.  The water and water plus additives expanded slightly.

Conclusion: The pop expanding might be enough to cause the can to pop open.  We didn’t know why the water didn’t seem to expand very much.  We didn’t know why it might or might not spray or “explode” out of the can.

Luckily when our resident scientist came home from work, he was able to point out a bit more information.  For one thing, we should have put lids on the glasses so no water could evaporate into gas.  Also, the carbonation of the pop might in fact have something to do with it.

Further internet searching after our experiment was over revealed that if the freezing water takes up more space, not all the pop in the can may be frozen yet, causing some to spray out of the can when it is suddenly popped open.  An “ask a scientist” feature at the DOE website points to the carbonation being a factor as well: “Soda pop is a super saturated solution of carbon dioxide (plus other ingredients). When it is frozen the CO2 and other dissolved substances are excluded from the ice that forms. So one is confining the CO2 to a smaller and smaller volume of “head space” in the bottle or can. If the bottle or can is not strong enough, the CO2 pressure will rupture the container.

Apparently this may be wrong information: This page at ehow and this site don’t agree with what the “Ask a Scientist” website suggested…I guess we still have more reading to do to learn exactly what is going on with these pop cans! 🙂

Fascinating stuff!  I’m linking up with Science Sunday @ Adventures in Mommydom!

Science Sunday